Deploy Office to Multiple Assets Concurrently
Scenario Description
For unified planning and management of all assets (including PCs, laptops, and servers), Company A needs to deploy a great number of software products. INC DAM is introduced to perform the scheduled software deploy tasks in batches for efficiency. The following example illustrates how to deploy Office software to three PCs.
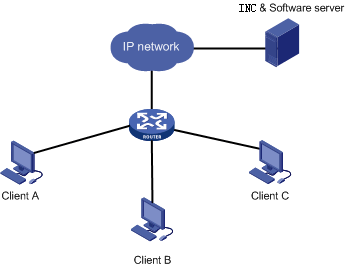
Network diagram of part assets
Scenario Analysis
A server is necessary to work as a software deploy server. Suppose all the assets and the server operate properly in the network. The three PCs are Client A, Client B, and Client C, each with iNode installed. The software deploy server is Software Server.
Perform the following configurations:
- Configure the software deploy server.
- Create an asset group and put the assets in the group.
- Create a software deploy task taskA.
- Create a software deploy task taskB.
- Run taskA and taskB. Compare their processes and results.
Operation Procedure
- Configure FTP transmission for the Software Server.
(1) Select the User tab, and then in the navigation tree of Desktop Asset Manager, select SW Server Settings.
(2) On the new page, click Add. In the page, specify Software Server for the server name, 10.153.128.254 for the IP address, 9023 for the port number, and FTP for the deployment method. Then select Active for the transmission mode and Yes for the anonymous user.
- Create an asset group.
(1) Select the User tab, and then in the navigation tree of Desktop Asset Manager, select Asset Group to enter a new page .
(2) Click Add. On the new page, type group 1 as the group name, specify the description, and then click OK.
(3) Repeat the step (2) to create another asset group, group 2.
(4) In the navigation tree of Desktop Asset Manager, select All Assets > group 1. Click Add. On the Add Asset page, type 001 in the Asset Number text box, select group 1 for the asset, configure the computer name as Client A and set other settings. Click OK. This operation adds Client A to group 1.
(5) Follow step (4) to add Client B to group 2 and Client C to group 1.
- Create a software deploy task taskA.
(1) In the navigation tree of Desktop Asset Manager, select SW Deploy Task.
(2) On the new page, click Add.
(3) Set the task name as taskA and the server name as Software Server. Configure the task to run immediately, and the delay to 3 seconds. The software is Office.exe, the file path is D:\OfficeInstall\, the quiet installation is selected and the installation file is set to be deleted after installation.
(4) On the Software Deployment Targets page, click Add Group and in the pop-up dialog box, select group 1 to add it to the group list.
(5) Click OK.
- Create a software deploy task taskB.
(1) Go back to the software deploy task page.
(2) Click Add.
(3) Set the task name as taskB and the server name as Software Server. Configure the task to run immediately, and the delay to 3 seconds. The software is Office.exe, the file path is D:\OfficeInstall\, the interactive installation is selected and the installation file is set to be saved after installation.
(4) On the Software Deployment Targets page, click Add Asset and in the pop-up dialog box, select Client B to add it to the asset list.
(5) Click OK.
- Run the two tasks and compare the processes and results.
(1) taskA is configured as quiet installation and configured to delete setup file after installation, and thus the system downloads the Office software to the assets in group 1, that is, Client A and Client C. Then the system automatically executes the installation and deletes the setup file from the assets in group 1. After taskA finishes, the assets Client A and Client C have installed Office and the setup file cannot be found in them.
(2) taskB is configured as interactive installation and save setup file, and thus the system downloads the Office software and asks for confirmation. After installation, the setup file is still in the asset Client B.
Related Topics